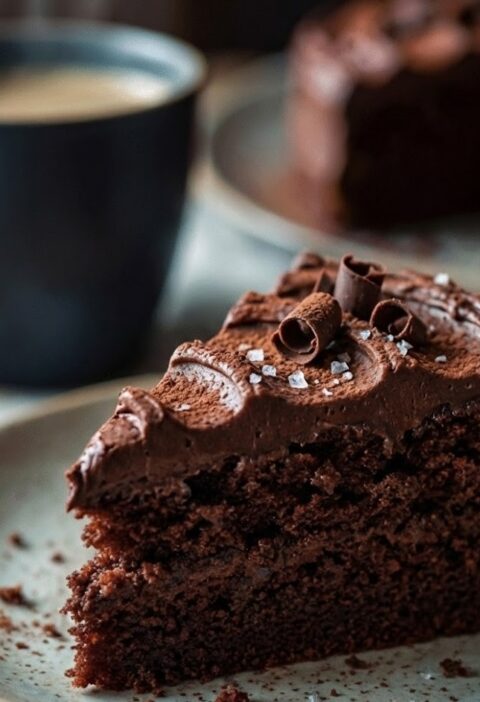
This dairy-free chocolate cake is a simple, dependable bake with a soft, moist crumb and a deep cocoa flavour. It is sandwiched and topped with a smooth dairy-free chocolate buttercream that slices neatly for birthdays and tea-time. The method is straightforward and forgiving, even if you do not bake often. Total time is about 1 hour 15 minutes, including cooling and decorating.
Ingredients
For the dairy-free chocolate sponges
- 225g dairy-free baking spread (block-style is best), softened, plus extra for greasing
- 225g caster sugar
- 4 large eggs
- 200g self-raising flour
- 25g cocoa powder
- 2 tsp baking powder
- 1/2 tsp bicarbonate of soda
- 1/4 tsp fine salt
- 3 tbsp dairy-free milk (soya or oat work well)
- 1 tsp vanilla extract
For the dairy-free chocolate buttercream
- 150g dairy-free baking spread, softened
- 300g icing sugar, sifted
- 40g cocoa powder, sifted
- 2 to 3 tbsp dairy-free milk
- 1 tsp vanilla extract
- Pinch of salt
To finish
- Dairy-free chocolate curls or shavings (optional)
- Fresh raspberries or strawberries (optional)
How to Make Mary Berry Dairy-Free Chocolate Cake Recipe
- Oven preparation: Heat the oven to 180°C (160°C fan). Grease two 20cm (8in) round sandwich tins and line the bases with baking parchment. Set the tins on a baking tray, this makes them easier to move in and out of the oven.
- Mixing: Sift the flour, cocoa, baking powder, bicarbonate of soda, and salt into a large bowl. Add the dairy-free spread, caster sugar, eggs, dairy-free milk, and vanilla. Beat with an electric mixer (or a wooden spoon and a bit of determination) until smooth and glossy, about 1 to 2 minutes. Divide the mixture evenly between the tins and level the tops.
- Baking: Bake for 25 to 30 minutes, until the cakes have risen, feel springy in the centre, and are just beginning to come away from the sides. If you want to be precise, a skewer inserted into the middle should come out clean.
- Cooling: Leave the cakes in their tins for 10 minutes. Turn out onto a wire rack, peel off the parchment, and leave to cool completely before decorating. Warm cakes will melt the buttercream.
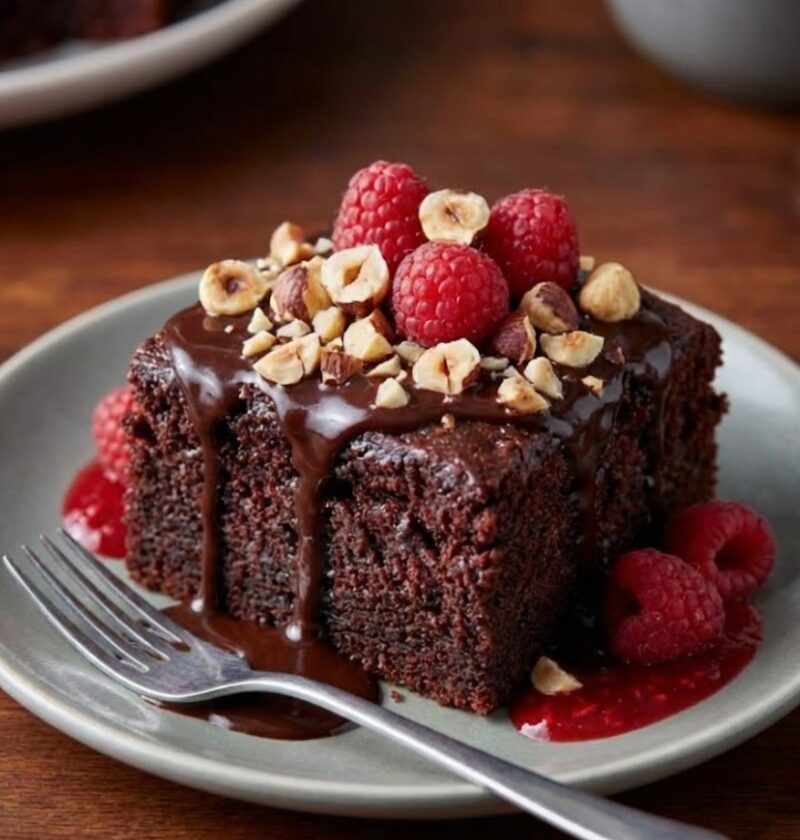
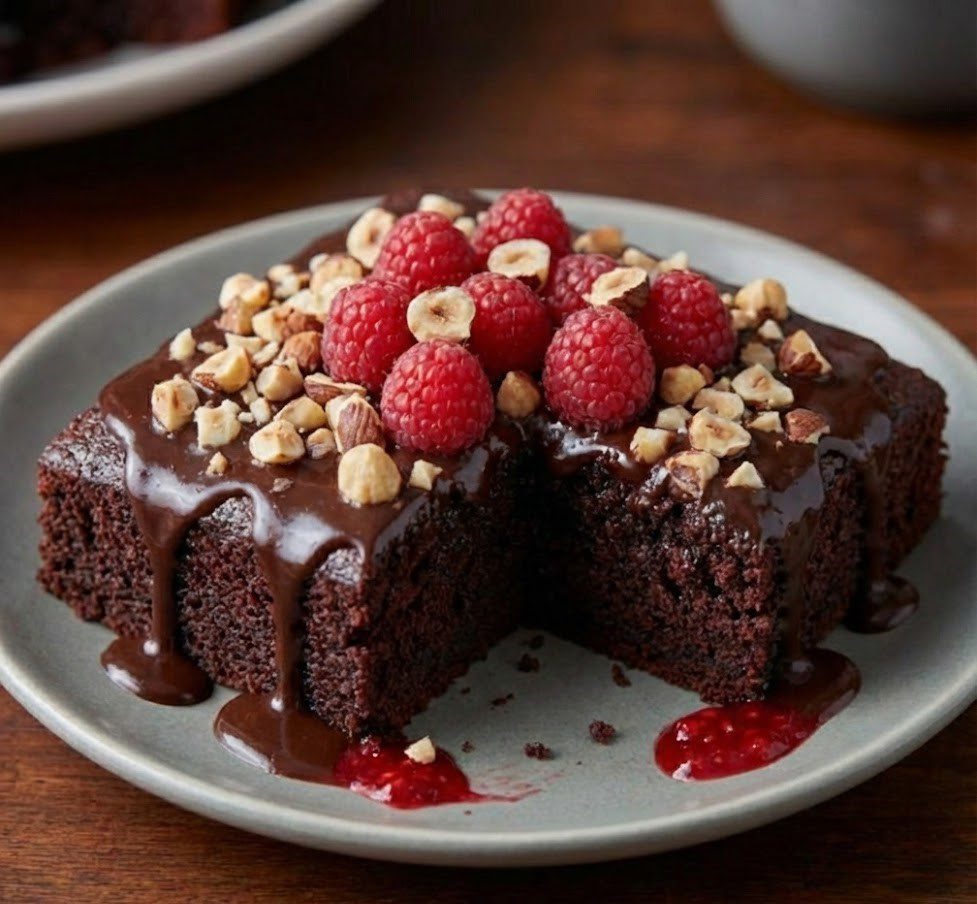
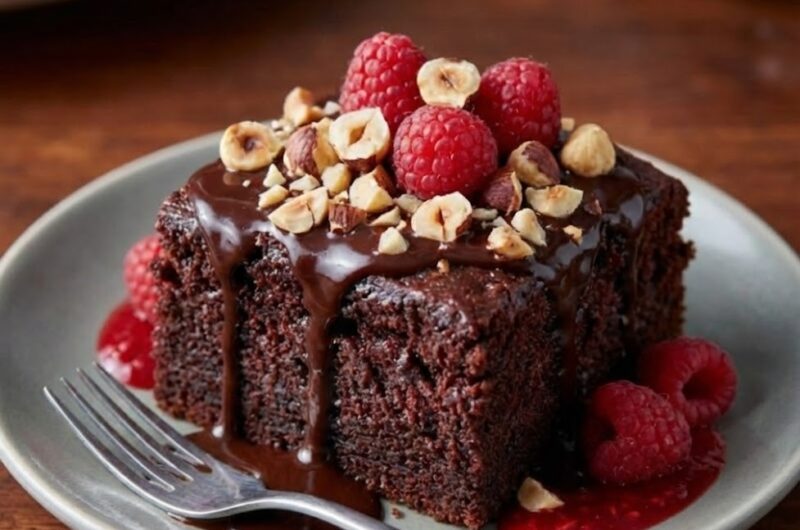
- Assembling: Make the buttercream: beat the dairy-free spread until creamy. Add the icing sugar and cocoa a little at a time (this helps avoid a cocoa dust cloud). Beat in the vanilla, salt, and enough dairy-free milk to make a smooth, spreadable buttercream. Place one sponge on a serving plate. Spread over about one third of the buttercream. Top with the second sponge. Spread the remaining buttercream over the top (and the sides too, if you like a fully covered finish). Decorate with chocolate shavings and berries, then slice.
Tips
Why did my cake sink in the middle?
This usually happens if the oven door is opened too early, or if the cake batter is overbeaten once the raising agents are in. Bake until the centre is properly set and try not to check it before 20 minutes.
How do I stop cocoa powder leaving lumps?
Always sift the cocoa with the flour. If you still get specks, beat for an extra 20 seconds, scraping the bowl well, especially around the base.
How can I make dairy-free buttercream less sweet?
Use a pinch of salt and make sure the cocoa is a full 40g. You can also add 1 to 2 teaspoons of strong espresso (cooled) instead of some of the dairy-free milk for a deeper chocolate flavour.
My buttercream looks soft, what should I do?
Pop it in the fridge for 10 to 15 minutes, then beat again briefly. Very soft dairy-free spreads can loosen quickly in a warm kitchen.
Serving suggestions
- Serve with fresh berries and a dusting of cocoa
- Add a spoonful of dairy-free vanilla ice cream on the side
- Pair with coffee, or a mug of strong tea
- Turn it into a celebration cake with sprinkles and candles
Storage
Room temperature
Keep in an airtight container for up to 2 days. If your kitchen is warm, store it somewhere cool and out of sunlight.
Refrigerator
Keeps for up to 4 days in a sealed container. Bring slices to room temperature for 20 to 30 minutes before serving for the best texture.
Freezing
Freeze the sponges (wrapped well) for up to 3 months. Defrost at room temperature, still wrapped, then make fresh buttercream and assemble. You can freeze finished slices too, but the buttercream texture may soften slightly after defrosting.
Nutrition
- Calories: 420 kcal
- Carbohydrates: 55 g
- Protein: 5 g
- Fat: 20 g
- Saturated fat: 6 g
- Sodium: 260 mg
Nutrition values are estimates and will vary depending on the dairy-free spread and milk you use.
FAQs
Is this cake vegan?
No. It is dairy-free, but it contains eggs. If you need it fully vegan, you will need egg substitutes and a slightly different method for best results.
What dairy-free spread works best for baking?
A firmer, block-style dairy-free baking fat tends to give the most reliable texture and buttercream. Very soft tub spreads can work, but the icing may need chilling to firm up.
Can I bake this in one tin instead of two?
Yes, use a deep 20cm tin and bake for about 40 to 50 minutes. Keep an eye on it, cover loosely with foil if it darkens too quickly, and make sure the centre is fully baked before removing.
Can I make this into cupcakes?
Yes. Divide between 12 cupcake cases and bake at 180°C (160°C fan) for 18 to 22 minutes. Cool completely before icing.
What can I use instead of cocoa powder?
For this recipe you need cocoa powder for structure and flavour. Melted chocolate behaves differently and can make the sponge heavy unless the recipe is rebalanced.
Mary Berry Dairy-Free Chocolate Cake Recipe
Course: DessertCuisine: BritishDifficulty: Easy4
servings30
minutes40
minutes300
kcal1
hour10
minutesA rich, moist dairy-free chocolate sponge finished with a smooth cocoa buttercream. An easy, reliable cake for birthdays, celebrations, or a simple slice with tea.
Ingredients
- For the dairy-free chocolate sponges
225g dairy-free baking spread, softened, plus extra for greasing
225g caster sugar
4 large eggs
200g self-raising flour
25g cocoa powder
2 tsp baking powder
1/2 tsp bicarbonate of soda
1/4 tsp fine salt
3 tbsp dairy-free milk (soya or oat)
1 tsp vanilla extract
- For the dairy-free chocolate buttercream
150g dairy-free baking spread, softened
300g icing sugar, sifted
40g cocoa powder, sifted
2–3 tbsp dairy-free milk
1 tsp vanilla extract
Pinch of salt
- To finish
Dairy-free chocolate curls or shavings (optional)
Fresh raspberries or strawberries (optional)
Directions
- Preheat the oven to 180°C (160°C fan). Grease and line the bases of two 20cm (8in) sandwich tins.
- Sift the flour, cocoa, baking powder, bicarbonate of soda and salt into a large bowl.
- Add the dairy-free spread, caster sugar, eggs, dairy-free milk and vanilla. Beat for 1–2 minutes until smooth and glossy.
- Divide the mixture evenly between the tins and level the tops.
- Bake for 25–30 minutes until risen and springy, and a skewer comes out clean.
- Cool in the tins for 10 minutes, then turn out onto a wire rack and cool completely.
- For the buttercream, beat the dairy-free spread until creamy. Gradually beat in the icing sugar and cocoa, then add vanilla, salt and enough dairy-free milk to make it spreadable.
- Spread a third of the buttercream over one sponge, top with the second sponge, then spread the remaining buttercream over the top (and sides if you like).
- Finish with dairy-free chocolate shavings and fresh berries if using, then slice to serve.
Notes
- Use a firmer, block-style dairy-free baking spread for the best texture and a buttercream that holds its shape.
- Let the sponges cool completely before icing, otherwise the buttercream will melt.
- Freeze unfilled sponges (well wrapped) for up to 3 months, then defrost and decorate fresh.